Getting Started
Setting up the AXis FC
Once you receive your Axis FC, it is time to set everything up. The Axis RC boards work like any other Arduino when you plug it into a computer and code it.
The Axis FC will be preloaded with a self-check code that will print to serial monitor. If you want to check it yourself, simply plug the USB-C port on the Axis FC into your computer. The board should power up and you should see the green LED light up to confirm everything is working.
Writing the Blink Sketch
Next you should try to upload the blink sketch to make sure your Axis FC can talk with your computer and the Arduino IDE. Load up the Arduino IDE, if you haven’t used an R4 Arduino before you may have to download. To make sure its installed, go to your board manager and make sure “Arduino Uno R4 Boards” is installed.
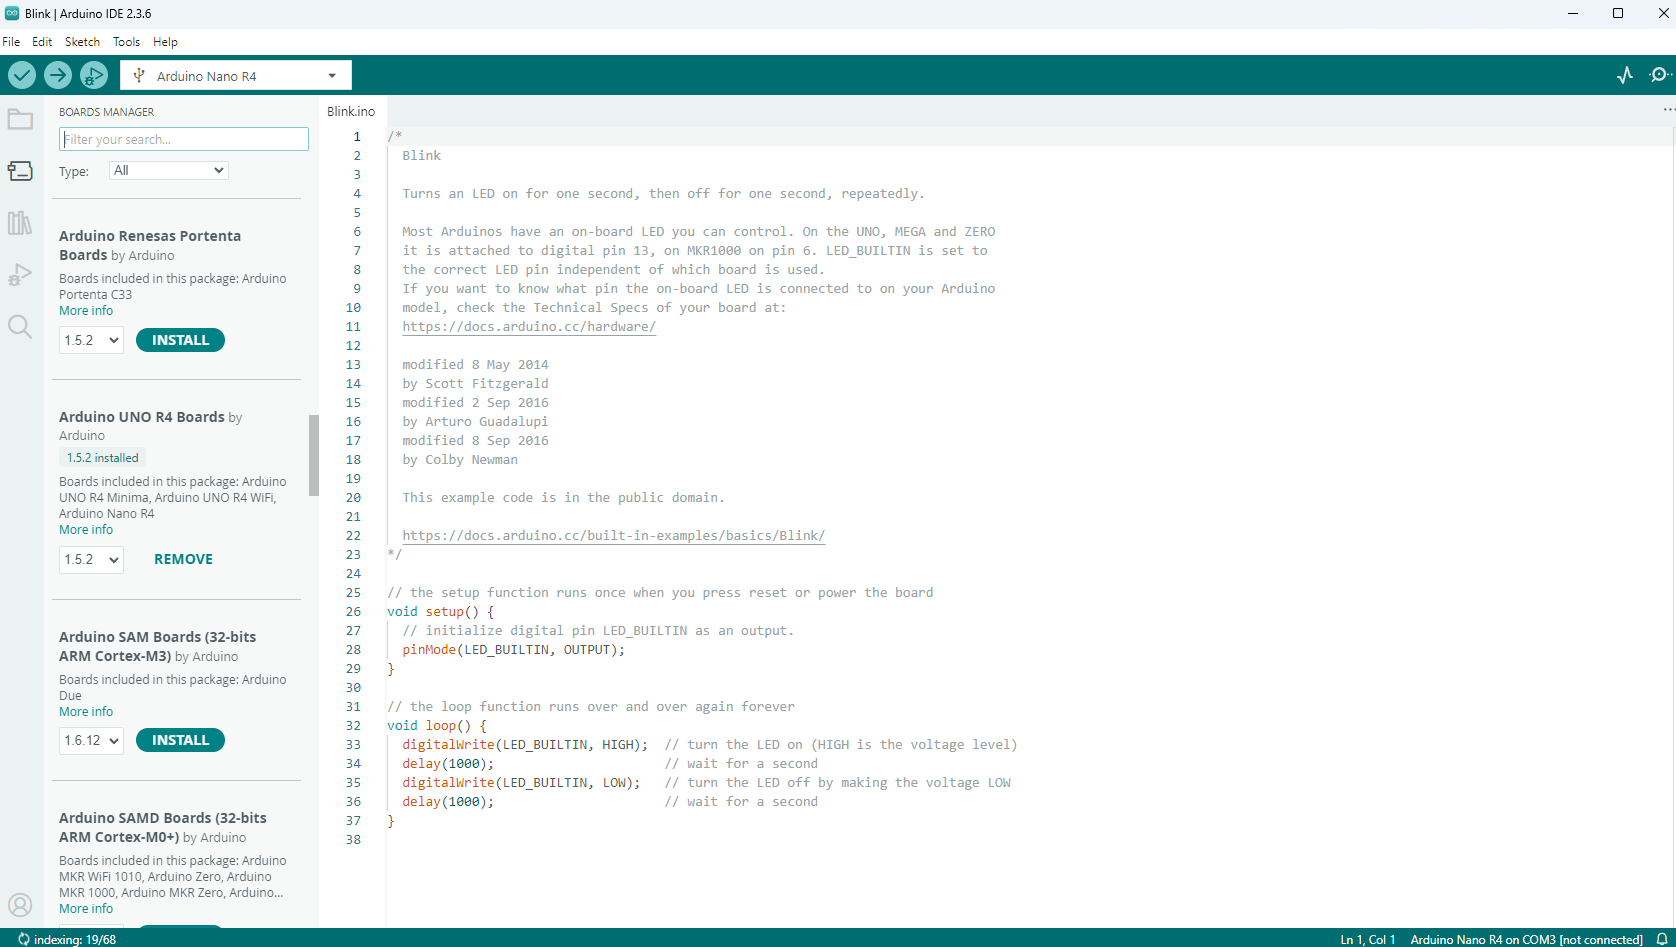
After installation, you should now be able to see the Arudino Nano R4 show up when you plug in your Axis FC.
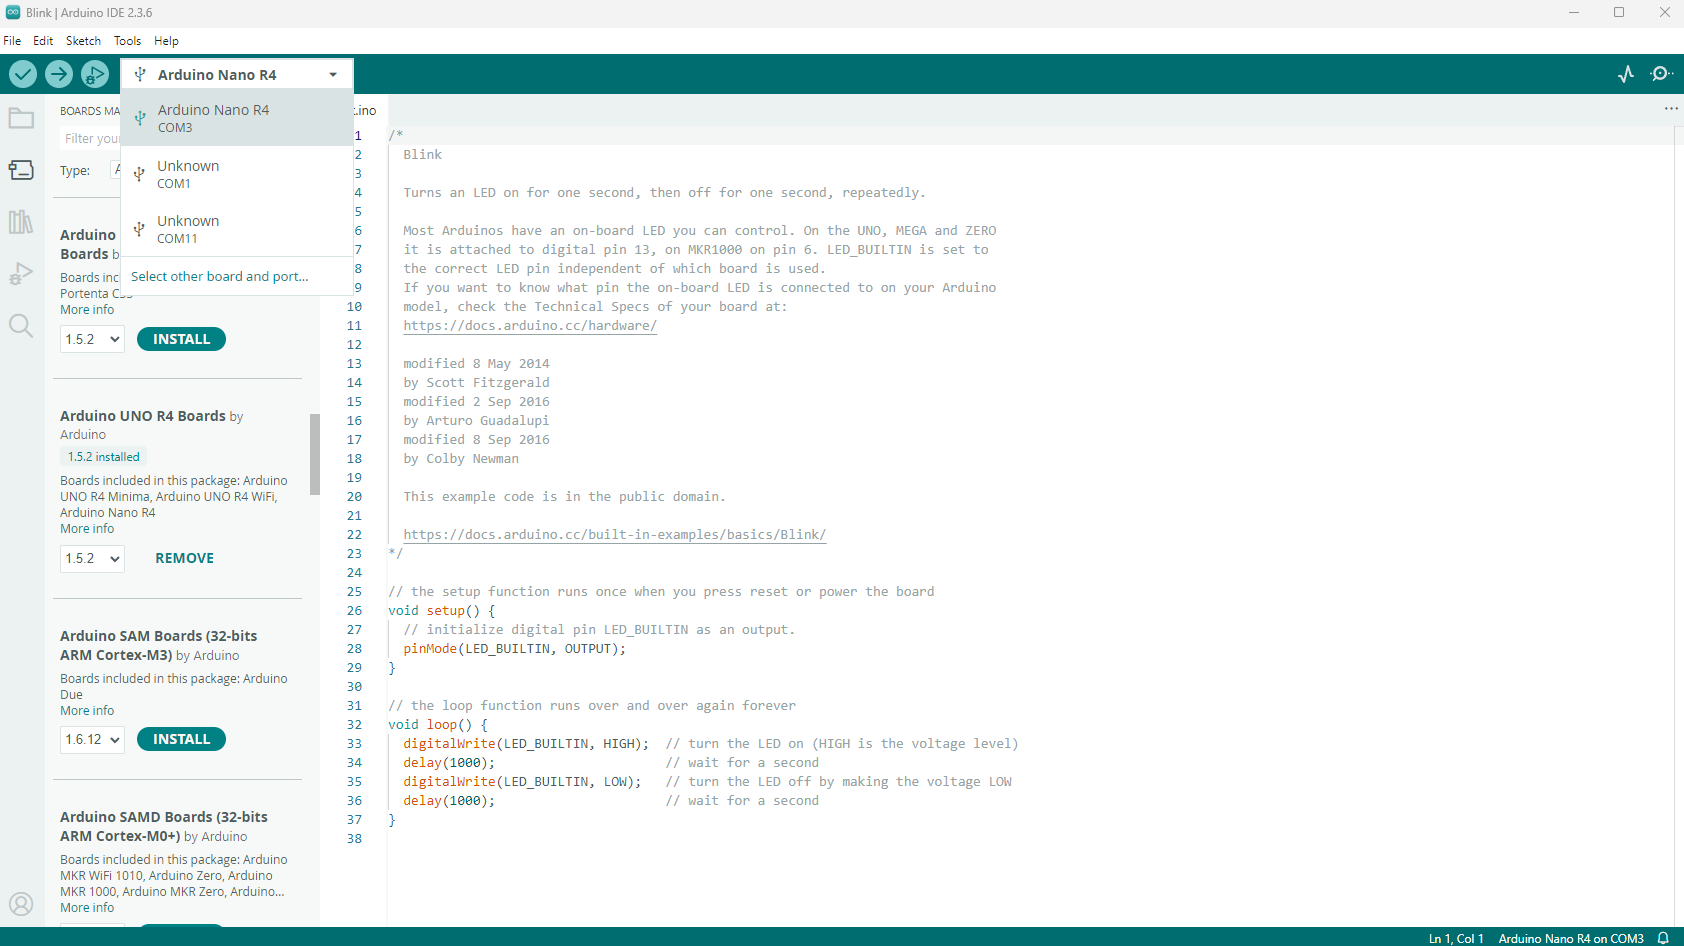
Now select the correct COM port and upload the sketch.
After successful upload of the sketch, your device is now ready to write your own code, or download Carbon-R4 from Github to get flying!